Monday, September 30, 2013

Ghost ,meringue.


Little meringue ghost yummies to spooooke the kids.. I add chocolate chips for the eyes and for the mouth to avoid the food colors. Recipe:
Hal­loween Ghost Meringue Cookies
Yield: makes 18–24 cook­ies depend­ing on the size

Ingre­di­ents

3 lg egg whites ( be very sure that no yolk remains in the whites, the fat will pre­vent the whites from peak­ing correctly)
3/4 cup gran­u­lated sugar
scant 1/4 tea­spoon cream of tar­tar (egg whites ben­e­fit from a small bit of acid to help them whip right)
A pip­ing bag (cake dec­o­rat­ing bag)
bak­ing sheets lined with either parch­ment or sil­pat liners

Instruc­tions

Sep­a­rate the whites from the yolks. Save the yolks in the fridge for another recipe. Let whites rest on counter until room tem­per­a­ture. Place in a very clean, dry bowl of a mixer. Beat at a low speed until whites look frothy & cloudy.
Increase mix­ing speed to medium and add the cream of tartar.
Mix until whites reach soft peak stage. The soft peak stage is reached when the peaks of the whites droop slightly, when the beater is turned off and lifted.
Increase mixer speed to high. Add the sugar at this stage. I added it at a steady stream on the inside edge of the bowl. Beat until firm peaks form. The egg white foam will become smooth, moist and shiny. Stop the beat­ers and then lift them — straight peaks should form.
Now con­tinue beat­ing on high until stiff peaks are formed. Whites will be very stiff and glossy. Make sure they are com­plete to this stage if you want defined peaks at the top of your cookies.
Refer to the web­page men­tioned above to see step by step pho­tos of each stage.
If you need a guide for the size of the meringues, use parch­ment and draw 1 inch cir­cles in pen­cil on one side of the parch­ment. They can be as close as an inch apart as the meringue doesn’t spread as it bakes. Flip the parch­ment over and place on the bak­ing sheet. You should be able to see the pen­cil lines through the parchment.
Pre­heat your oven to 225 degrees Fahrenheit.
I find that for these ghosts, just using the open­ing of the pip­ing bag instead of a dec­o­rat­ing tip worked best.
Scoop the meringue into the pip­ing bag.
Close and pipe cir­cles onto the parch­ment, fill­ing to fit the cir­cles. Pipe out the meringue in the shape of lit­tle ghosts. Pull up at the end to make the peak. The tips should look like choco­late kisses. Just prac­tice to get this shape. The not-perfect ones still taste deli­cious, and the vari­ety gives the ghosts personality!
When all meringue is used or pans are filled, place into the oven for 1 hour and 30 min­utes. Don’t peek! Let set on pans for a few hours after done bak­ing before dec­o­rat­ing. They are a lit­tle frag­ile, espe­cially at the tip, but so yummy!
When cooled, add eyes and a mouth using dec­o­rat­ing gel. Make them dif­fer­ent look­ing to give the ghosts some charm!

Tuesday, September 24, 2013

Reusing an old tee shirt ..

Today I will be showing you how to reuse an old tee shirt to make a new vest or tank tops.My husband has loads of tees dating back when he was in collage and insists in keeping them all. Well I had other plans.. I made new tank tops, there so many things that you could do with old tees. You could make bags,new tops like these ideas below,scarfs ,fringed scarfs, use the patterns on new tee shirts, pillow cases and many things. You could also cut them up and use them as rags.. Hope you enjoy these fast and creative ideas.
For the bottom  tank top I followed these steps above .
Then I used fabric paints ,a sponge and a crochet doily , I placed it on the tee and stamped the patten on the tee .


This takes no more tan 5 minutes

A racer back tee


Home made Trahana soup..


I am excited for this post and happy that it worked out so good and yummy.. I bet your wondering what I am talking about ..ill tell you right now..
I fancied some Trahana this Evening and my oldest Boy has been asking for it for a long time.. So I tempted to make it. And it tastes great.. Now I'll tell you how you can make it at home nice and simple.. First of all for you that don't know what TRAHANA is ill tell you:
It's a traditional Cyprus soup made with Purgar  wheat and goats milk or some make it with goats yogurt. In the villages in the older days they made it in the winter time in boiled chicken stock. 
What they did is they boiled the burgar wheat with goats milk until they made a paste and left it out until it went sour, then they make in little pies and left it out in the sun so it would go dry ..some used when it was still fresh .
What I did was this:
I filled a large pan with water and in that put some chicken stock , in that I put one cup of burgar wheat , I tup of sour goats yogurt ,one cup of goats milk, 2 lemons, half a tsp of pepper and some salt according to taste..now if I had one more yogurt tub I wouldn't of used the goats milk and used one lemon less. Cut one whole halloumi cheese in to little pieces and put them in too.
Now boil it until its the burgar wheat is cooked and it becomes creamy and tasty:-)about half hour should do it.. And then enjoy.. Easy weezy...


Sunday, September 22, 2013

Paper tape roads ..

There those days when one just wants to sit down and rest, no errands no school no crafting.. Unfortunately with 2 energetic kids in the house this Is not possible.. Even the TV doesn't do the trick on these kind of days. It's like the read my mind and as soon as I sit down with my coffe and start cruising the Internet for some awesome ideas , that's when they start running around like mad ,screaming to the top of the voices and the fighting starts too..
And I finely find something to do for the little ones and come back to sit on my comfy chair and just as I start to write in m blog DH want attention too.. Oh well!! It's all good...
So today was one of these days .. And this is what i did..
Took the paper tape and made roads on the floor. Got them to bring there cars and blocks ,car parks and car washes and told them to build a town ...
This works wonders they were so happy and excited , occupied and working together in a nice manner.. And me ::: enjoying my coffee and writing my blog..:-)
You could do this with any colour tape I just had the white one . I used electrical white tape for the road lines and that was it.. Hours of play and fun for them and for me too..
Have a great  Sunday , I hope you could use this idea to give you some time out..


Tuesday, September 17, 2013

Diy tub scrub..

Hi there I have a short post for you but very effective.. I will share with you my diy recipe for scrubbing tubs ,toilets and faucets . You get the clean toilets and kitchens without the chemicals that are harmful for us and the invoroment.. And you will feel great about doing your part for the planet and keeping your family healthy.
So is simple and you most probably have all the ingredients in your own pantry..
You will need:

  1. 1 cup Baking soda
  2. Liquid soap like fairy or (Castile soaping you can get hold of it)
  3. Half cup White vinegar 
  4.  20 drops of one kind Essential oils( lemon, tea tree,lavender) tea tree and lavender are antiseptic.
     Any citrus kind of oil works good for a fresh smell.
  5. Container with a lid
So what you do is this:
Measure out your cup of baking soda and squirt some fairy liquid on top of the baking soda , slowly poor out the vinager SLOWLY I meen it , and mix as your poor.Its tricky but doable:-) mix all together until you get a nice paste . If its too runny add some more baking soda until you get a nice paste like consinstancy. Add your oils and mix again.
Put the lid on and when you ready to use it take a scrubby sponge and scrub your tubs and faucets...Leave it on for a couple of minutes and them wash off..
Now I don't know the exact amount of fairy liquid that I put in I just eye ball it, if I had to guess though I would say about 2 table spoons..

* another tip in between your toilet and kitchen scrubs you could use your lemon peels when your
done with the lemon juice , rub the lemon in the sinks and taps to get them shiny .. This works well for everyday cleaning ..
Good luck and happy scrubbing :-)

Monday, September 16, 2013

Toilet tube pirates telescope..

Last night before bed time my 4 year old had collected some toilet tubes and wrapping paper tubes from our recycled box , he  told me that when he was at school he would like me to make him a pirates telescope please..
So when I took him to school I got home and for to work, I got black paint , foil tape, gold ribbon ,packing tape and glass Jewells . I first cut the wrapping paper tube to a size that  i wanded , wrapped the top part in foil ,then you have to slide the toilet tube on top of the foil to make it stay on place, you need to stick that part with sticky tape , I used the wide packing see through tape.
Then paint the big tube in black and give it 10 minutes to dry.
Make holes on either side for the ribbon to slide through , and tape all of the toilet tube in the foil tape.
Plug the hot glue in and when it's hot stick your glass jewels around the toilet tube.. Cut some skeleton  bones out of craft foam and stick them in the middle of the big tube witch you painted black..
Thread the ribbon and knott on either side.
Ready!!! Now give it to your young pirate to go exploring for ships and bad pirates..Aboy Mateys..


Friday, September 13, 2013

Gardening in small spaces..

A lot of people talk about wanting to grow there own veggies but say they haven't got a lot of room, or they live in a apartment and don't know we're to grow them..
So today I will post a few links and ideas for you to read and consider for you to grow your veggies were ever you might live and how ever much space you have.. It takes some imagination and effort but its well worth it when you see your veggadables growing and the feeling about picking your own grown stuff is great.
Involve children in your home grown food too ,it makes them feel happy and gives them responsibility about taking care of them ,watering them and a feeling of satisfaction when the vegetables are ready for picking.
I remember we put some potatoes one time in an old ikea bag and kids were amazed when the potatoes were ready and they were digging them up, because from one potato you can get 5 so they multiplied.. So below there are links of some good ideas for your garden and ideas about what grows best in small spaces and in pots.. Hope you enjoy and have a great day..
http://www.bbc.co.uk/gardening/digin/your_space/
http://www.sunset.com/garden/fruits-veggies/small-space-vegetable-gardens-00400000044403/


http://www.pinterest.com/lara_50/growing-vegetables-in-a-small-space/

http://gardening.about.com/od/vegetables/a/SmVegGarden.htm

 http://m.wikihow.com/Grow-Vegetables-in-Small-Gardens


http://www.verticalveg.org.uk/ten-great-crops-to-grow-in-containers/
http://www.verticalveg.org.uk/how-to-save-tomato-seeds/

Wednesday, September 11, 2013

Kids Poppy paintings.

We painted with the kids today as our afternoon activity, we used some canvases and acrylic paints .
I gave the kids some thin wood pieces some sponge ,brushes and paints. At the bottom of the canvas we put some blobs of paint and kids scraped it  upwards with the wooden pieces. This gives a really nice effect on the canvas , them they used there pieces of sponge to make patterns.
When they were happy with there painting my eldest had the idea of putting some blobs of paint and with the flat side of the wood to swirl it around to make snails and poppies.. With some green we made some stems for the flowers and the result was fantastic...kids signed and paintings were left to dry.


Monday, September 9, 2013

Diy lice repellant spray..

With school starting up I thought I would share my diy lice repellant spray , this is good for prevention of lice and the little menaces hate the smell so they keep well away from the kids hair.
All you need is:
 10 drops Lavender
10 drops Eucalyptus
10 drops Tea Tree Oil 

I spray bottle ( normal garden sized )
Water

Poor water in the spray bottle ,put 10 drops of Lavender,10 drops of Eucalyptus ,10 drops of Tea tree essential oils. Give it a good shake before use and just spray on child hair each morning before school..
That's it simple and effective.. Wishing you all a good school year.

Thursday, September 5, 2013

Recycled foil pie tin craft

My oldest collected some stuff from the recycled box ,got out the hot glue gun and he said he had a craft idea to work on. So I let him to get on with he's craft and when he was done he came in the room happy and proud of he's creation. It was a robot head made from bottle tops from beers and water bottles some yarn a foil pie tin and a old top from a box.
Now it's a part of our art wall gallery in the play room. With a little bit of imagination and a few scrap pieces art is made. You could recycle anything you have to make art, with a bigger top from a box you could made a scene of flowers ,trees ,people and anything you could think about. Ask your children for there ideas ,kids come up with the greatest and imaginative ideas..
Have a great day you all out there..


Wednesday, September 4, 2013

I back to school free labels

 It's soon back to school and you parents are probably getting the kids stuff ready just as I am.
I like to have things labeled the kids bags ,books,lunch box,folders and pencil cases.
Some labels I order online , the kind that don't come off in the wash, those ones for the school bags that need to be a bit more durable and others I print on sticker printable paper and stick them on there books and folders.
You could also print them on paper too and them glue them on,and mod podge them if you like.(pva glue)
I will share with you some links that you can go and download for free some very nice labels.
Hope you enjoyed this post and have fun in the new school year..

http://alphamom.com/family-fun/holidays/free-printable-lunchbox-notes-tags-stickers/
http://alphamom.com/wp-content/uploads/2012/09/Lunch-Box-Jokes.pdf


http://tarisota.typepad.com/files/school-label.pdf
http://tarisota.typepad.com/files/class-label.pdf


http://www.livinglocurto.com/wp-content/uploads/2011/08/Personalized-Snack-Labels-
©LivingLocurto.pdf


http://eps-ai.blogspot.com/2012/05/abstract-vector-paper-labels.html


http://ziggityzoom.com/website/activities.php?a=161


http://orangeyoulucky.blogspot.com/2009/06/bookplates-for-you.html


Tuesday, September 3, 2013

Reusing those broken crayons..

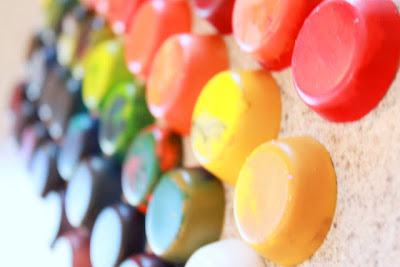
My kids love to draw all the time and we are left with loads of crayons that are broken and just left at the bottom of the crayon box looking messy . So we made it in to an activity with my boys to melt them and make new ones.
So what you do is this:
Get  kids to peel of the paper of the broken ,chipped crayons, separate them in too different colors.
Orange with orange ,blues with blues.reds with reds and so on.....
You will need a cup cake tin and or shaped molds to put your crayons in side. If you would like rainbow colored crayons them mix the colored crayons together in the cup cake tin or molds.
Put your oven on to 180 C and put your tin in the oven until crayons are melted.. Now if your mold is not oven safe you could melt the crayons in a pan and them pour the melted crayons in your molds..
Let the mixture cool completely and then remove them form the tin or the mold..
I gave some for party favors for one of my boys birthday party, ours were fishes and wrapped in a cello bag with a pretty ribbon and thank you card..
Have fun melting :-)


Sunday, September 1, 2013

Secret garden hideout..


Secret garden hide out.. Make a secret play area with your children so they can play and pretend. They can paint it and make chimes to hang on the branches. Put logs of wood for seats old tiles for the floor..
My boys have been working on there's 2 days now and there having fun.. Choose a good area in your garden were bushes and trees are tall and were there is an area that looks like a little cave so kids can go under and play. 
We choose a nice place were our fairy garden is , we have bushes ,trees and shrubs that are grown big and its an ideal place for a secret garden. 
My eldest cleaned and cut the lower branches yesterday and wheelbarrowed some stones in side for he's floor. We made a frame from wooden planks that became  the hideouts wall.
On that we used and old large box and stapled it on,cut some windows and a letter box slot and the kids painted on it.
Next over the time we will make some chimes to hang from the branches . Kids made a plastic cup banner a wile back and that was hung on the branches as decoration along with some paper Pom pons.
Hope we have inspired you to make your secret hideout garden.. Have a great Sunday..