My kids love to draw all the time and we are left with loads of crayons that are broken and just left at the bottom of the crayon box looking messy . So we made it in to an activity with my boys to melt them and make new ones.
So what you do is this:
Get kids to peel of the paper of the broken ,chipped crayons, separate them in too different colors.
Orange with orange ,blues with blues.reds with reds and so on.....
You will need a cup cake tin and or shaped molds to put your crayons in side. If you would like rainbow colored crayons them mix the colored crayons together in the cup cake tin or molds.
Put your oven on to 180 C and put your tin in the oven until crayons are melted.. Now if your mold is not oven safe you could melt the crayons in a pan and them pour the melted crayons in your molds..
Let the mixture cool completely and then remove them form the tin or the mold..
I gave some for party favors for one of my boys birthday party, ours were fishes and wrapped in a cello bag with a pretty ribbon and thank you card..
Have fun melting :-)
Tuesday, September 3, 2013
Sunday, September 1, 2013
Secret garden hideout..
Secret garden hide out.. Make a secret play area with your children so they can play and pretend. They can paint it and make chimes to hang on the branches. Put logs of wood for seats old tiles for the floor..
My boys have been working on there's 2 days now and there having fun.. Choose a good area in your garden were bushes and trees are tall and were there is an area that looks like a little cave so kids can go under and play.
We choose a nice place were our fairy garden is , we have bushes ,trees and shrubs that are grown big and its an ideal place for a secret garden.
My eldest cleaned and cut the lower branches yesterday and wheelbarrowed some stones in side for he's floor. We made a frame from wooden planks that became the hideouts wall.
On that we used and old large box and stapled it on,cut some windows and a letter box slot and the kids painted on it.
Next over the time we will make some chimes to hang from the branches . Kids made a plastic cup banner a wile back and that was hung on the branches as decoration along with some paper Pom pons.
Hope we have inspired you to make your secret hideout garden.. Have a great Sunday..
Saturday, August 31, 2013
A good idea for public toilets...
This is a good idea for little kids that want to go in public toilets. Keep one roll of socks in your bag and when the little one wants to go slip them on the seat. Just make sure to wash them after you go home for next time use..and keep a plastic bag to put them in so the germs just stay in the bag..
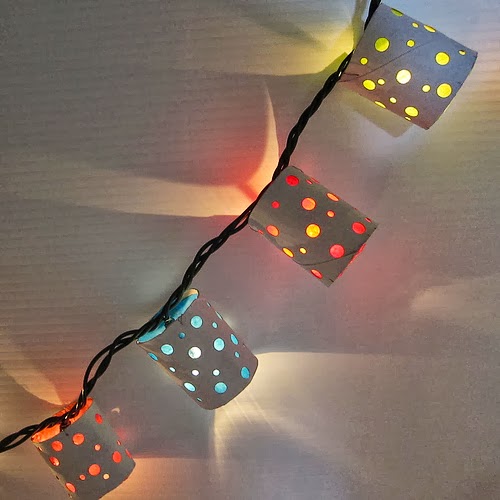
Toilet tube lanterns.
I ran across this toilet tube project on an other blog and i wanted to share, I will make these for sure. Such a good idea and how lovely would these look on a tree in a kids room or palyroom .http://www.justcraftyenough.com/2013/05/project-polka-dot-paper-lanterns/
Just click on the link for the tutorial and for more photos ..
Thanks for looking have a great weekend.
Just click on the link for the tutorial and for more photos ..
Thanks for looking have a great weekend.
Friday, August 30, 2013
Build a play fort...
Tents, playhouses and forts are always fun ways to keep children's imaginations alive. My kids love to make secret hide outs and pretend to be pirates or knights. So today we build a play fort.
We build it from sheets, blankets and boxes . What's you need is a big space in your home put together couches, tables and chairs to drape your sheets and blankets over, you could use paper tape or cloth pins to keep it in place. Make a tunnel from cardboard boxes and use flash lights to make it more exciting in there forts.
Put some pillows and toys in for them and let the games begging:-) kids can spend a long time playing ,pretending and having fun.. You could drape sheets over bunk beds to If you have them and dinning room tables make good play houses and hide outs also..
This was a short post but I hope you enjoyed it.. Have a great day..
Thursday, August 29, 2013
Back to school lunch box ideas..
School time is almost here and I always like to make kids lunch boxes interesting and fun, always on the healthy side thought .
So today I will be sharing a few ideas with you how to make the kiddos lunch boxes fun and healthy.
I will share some recipes and photos , it doesn't take too long to skip the ready snacks witch are packed with too much salt,sugar ,color and additives. It's super easy to keep kids happy. And healthy.
Veggie stick with a dip in a jar:
Fruit kabobs :
Celery sticks with cream cheese topped with olives,chicken pieces or ham.
Sandwiches made from home made bread made with nutritious whole wheat flour or a gluten free mix, packed with grains and nuts.
This would be nice for lunch boxes, refrigerator Oatmeal.
Go to this link for recipes..
This is also a yummy lunch box treat my kids love these cookies.
These are super yummy and super easy to make ,you can store them in an air tight container. I substitute the white flour with whole grain or a mix of gluten free flour.
Find recipe here:
Mix! 1 C each of white rice flour, coconut flour, oat flour, and tapioca flour/starch, 1/4 C cornstarch, and 3.5 tsp xantham gum. Mix well and store in airtight container. Use cup for cup in any recipe that calls for flour.
Tuesday, August 27, 2013
Chalk board DIY
Changes are going on in our playroom and one thing I always wanted to make is a chalk board on the wall . So I went out and found chalk spay paint , got home moved some furniture around and found the perfect wall for it. So I wiped the wall sown well measured the square and paper taped a border ,make sure you put double tape around and make the border thick if using spray paint because it will splat on your wall. And always put a mask on to cover your nose and mouth. Open all your windows and start spraying:-)
I did 2 coats on this one and let it dry for a couple of hours, then take chalk and cover the whole board and wipe it down with a dry coat. I got some colored paper tape and put it around the board as a border to make it look nice and to complete the board.
That is it.. Thank you for reading :-)..
I did 2 coats on this one and let it dry for a couple of hours, then take chalk and cover the whole board and wipe it down with a dry coat. I got some colored paper tape and put it around the board as a border to make it look nice and to complete the board.
That is it.. Thank you for reading :-)..
Subscribe to:
Posts (Atom)